Showing posts with label Recipes. Show all posts

Sunday, May 10, 2020

Easy Homemade Pizza Crust

Ingredients:
1 package active dry yeast or 2 1/2 tsp active dry yeast
1 tsp white sugar
1 cup warm water
2 1/2 cups flour
2 T olive oil
1 tsp salt

Preheat oven to 450 degrees.
Dissolve yeast, sugar, and water in bowl.  Let stand until creamy, about 10 minutes.
Stir in flour, salt, and oil to yeast mixture.  Stir until blended.  Let stand for 5 minutes.
Turn dough onto floured surface and roll into ball.  
Pull off dough and roll into desired size of pizza.
Add toppings and bake in preheated oven for 15 to 20 minutes, or until golden brown. 
Let stand for 5 minutes before cutting and serving.
Enjoy!!

Tuesday, August 9, 2016

Homemade Italian Tomato Sauce


I have had an abundance of tomatoes already this year!  For the past few days I have been cooking down homemade Italian tomato sauce.  I am trying a new recipe this year and thought I would share it with you because it has turned out really delicious.  
First, I washed and then cut all my tomatoes in half.  I spread them out on a cookie sheet.  Drizzled olive oil, salt, and pepper over them.  I added cut up onions and lots of garlic.  I then topped it with fresh basil.  I placed it in the oven at 250 degrees for 2 hours.  
Once they were well roasted I pulled them out, let them cool and then ran the whole batch through my KitchenAid food strainer.  I placed the pulp onto the stove and cooked it down till the sauce reached the desired consistency.  
I decided to make one more batch in the oven but I removed all the skin and seeds from the tomatoes and once it was roasted I pureed it a bit and added it to the original batch to thicken it up.

Here it is on the stove and almost all ready to preserve!  

On a side note.  I posted on my Facebook page that my first batch of tomato sauce tasted really bitter and I couldn't figure out how to fix it.  I have since discovered thanks to my husbands research that you should not cook tomatoes (or any acidic foods) in aluminum pans because it can lead to a metallic, bitter flavor.  

Wednesday, March 25, 2015

Roasted Tomato Soup

Roasted Tomato Soup
Serves 2

2 lbs tomatoes
1 small yellow onion
3 cloves garlic (I doubled this)
2 T tomato paste (I used 1/3 cup sauce)
1 T olive oil
2 T fresh chopped parsley
1 1/2 cups vegetable stock
1/2 cup whole milk or heavy cream
Salt 
Pepper

Preheat oven to 350 degrees


Line a baking sheet with aluminum foil.  Cut tomatoes and onions into wedges.  Tuck garlic into tomatoes so they don't burn.  Toss with olive oil, parsley, salt, and pepper.  Bake in oven for 30-45 minutes or until tomatoes are half their original size.  


Add vegetable stock to pot over medium heat.  Add tomato paste (I didn't have paste so I used homemade tomato sauce) and stir till dissolved. Once cooked add roasted tomatoes and onions to pot and simmer for 5 minutes.   
Add mixture to blender or food processor and blend until desired consistency.  Add soup back to pot over low heat.  Add milk or cream.  Allow to simmer for a few minutes.  

Pour into bowl and enjoy!


Tuesday, January 29, 2013

Homemade Bread in the Kitchen Aid Mixer

For Christmas this year my dear husband bought me a KitchenAid standing mixer.  I was totally excited.  I was sold on them last year after using my in-laws during the canning season to process tomatoes.  There is all sorts of fun attachments you can buy to help you do just about anything in the kitchen.

The mixer came with a dough hook and even though I was skeptical I decided to give bread a try.  I used the recipe that came with the mixer and I was very impressed.  The bread was a hit with my family and it is super easy and doesn't take much time.

When I started making my own bread a few years ago, I did all my kneading by hand and it was so time consuming.  I eventually found a recipe that I could use for my bread machine and I have made all my own rolls, breadsticks and basic bread that way for quite some time.  Now that I have a KitchenAid, this is my go to way of making bread.  I have been making bread once or twice a week for the last few weeks and everyone has been happy with it.

Here is the recipe I use.  It will make 2 loaves.

1/2 cup milk
3 Tablespoons sugar
2 teaspoons salt
3 Tablespoons butter

2 packages yeast
1 1/2 cups warm water
5-6 cups of all-purpose flour

Place milk, sugar, salt and butter in a saucepan and heat over low till butter is melted and sugar dissolves   Cool to lukewarm.

Dissolve yeast in warm water in warmed mixing bowl.  Add milk mixture and 4 1/2 cups of flour.  Using dough hook mix on speed 2 for about 1 minute.  Continue on speed 2 and add remaining flour 1/2 cup at a time.   Mix until dough clings to hook and cleans the sides of the bowl.  Knead on speed 2 for 2 minutes long or until dough is smooth and elastic.  Dough will be slightly sticky to the touch.

Place dough in greased bowl and cover.  Allow to rise for 1 hour or double in bulk.  Punch down dough and divide in half.  Shape each half into a loaf and place in well greased loaf pan.  Cover and let rise about 1 hour or double in bulk.

Bake at 400 degrees until golden brown about 30 minutes.  Cool on wire racks.

You will want to remove bread from pans and allow to cool on wire rack.  
This post is linked to the Frugal Tuesday Tip hosted here at Learning the Frugal Life.

Monday, April 9, 2012

Homemade Smoothie - Sneaking in those Veggies

My family loves smoothies! We have smoothies for snack once in a while, but mainly I eat them for lunch a couple times a week. It makes a yummy, healthy inexpensive meal.

I have always added spinach to our smoothies because it is a great way to get in a serving of veggies. Spinach has a very mild flavor and you don't even taste it. This weekend my husband suggested I toss some cauliflower into his smoothie. I was very hesitant to try it. I added 3 large chunks to the blender. I was surprised that I couldn't taste it either.

So today I made a smoothie for lunch and here is how I made it. Keep in mind I don't measure anything. I put it all in the blender and mix it until it is the consistency I like.In a blender-
add about 3/4 cup yogurt (I used Stoneyfields vanilla yogurt)
a handful of spinach
a handful of cauliflower
a handful of frozen strawberries
a handful of frozen raspberries
1 banana

Blend and add in enough liquid to get your desired consistency. Today I used Soy milk because we are needed to get that used up. I usually add regular milk and have used apple juice before.

Do you make smoothies? What is your favorite flavor?

This post is linked to the Frugal Tuesday Tip hosted here at Learning the Frugal Life.

Monday, March 5, 2012

Homemade Playdough

A few years ago my younger boys were gifted with some homemade playdough. 3 years later we are still using that same playdough. My son, who is a lover of all things playdough, thought we needed to add some different colors to our collection. So we whipped up our own batch of playdough. Here is the recipe we used.

Homemade Playdough

Ingredients
1 1/2 cup flour
3/4 cup salt
3 tsp cream of tarter
1 1/2 T oil
1 1/2 cup water

Place all ingredients into pan on stove. As the mixture gets warm it will start to get sticky. Keep stirring until you get the dough consistency. Remove from pan. Remember, the dough will be hot. You can add coloring at the beginning when you add all ingredients into the pan or you can wait and knead it in later once the dough has cooled.

Friday, February 10, 2012

Homemade Playdough

A few years ago my younger boys were gifted with some homemade playdough. 3 years later we are still using that same playdough. My son, who is a lover of all things playdough, thought we needed to add some different colors to our collection. So we whipped up our own batch of playdough. Here is the recipe we used.

Homemade Playdough

Ingredients
1 1/2 cup flour
3/4 cup salt
3 tsp cream of tarter
1 1/2 T oil
1 1/2 cup water

Place all ingredients into pan on stove. As the mixture gets warm it will start to get sticky. Keep stirring until you get the dough consistency. Remove from pan. Remember, the dough will be hot. You can add coloring at the beginning when you add all ingredients into the pan or you can wait and knead it in later once the dough has cooled.

Monday, January 30, 2012

Homemade Egg Noodles

I have always wanted to try and make my own noodles. I enjoy going to the Farmer's Market and checking out the booths selling homemade noodles. Some how the task always seemed a bit daunting.

Then a few weeks ago, I was contacted by an old high school classmate. We didn't know each other when we were in school. Roughly 15 years later we bump into each other in the hallway outside our children's Kindergarten classroom. We get to talking and I find it fun that she is a backyard chicken owner as well! We eventually meet for coffee and realize we have lots in common. The following week she taught and helped me prepare my first batch of homemade noodles. She has been making them since she was a child so who better to learn from.

I was surprised how easy it really is. Here is the process.

First thing is to start off with a nice, clean counter. A good amount of counter space is important. If only my kitchen counters always looked this nice. The ingredients are as follows:

1 cup flour
1/2 tsp salt
1 beaten egg
2 Tablespoons milkCombine all ingredients into a bowl and mix together with a pastry blender. Once mixed place dough ball onto a well floured surface.We quadrupled the recipe. I wanted to make sure I would have extras for future use. Roll dough out to desired thickness. Having lots of flour is key. This will make sure the dough does not stick to the counter or rolling pin. You can't have too much flour. It's a little hard to see because the dough is about the same color as the counter.
Using a pizza cutter, cut dough into strips. You can make them as skinny or as wide as you like. I really like the Reames frozen egg noodles so that was the size I used as a reference. Once all the dough is cut, you can add them directly to your soup. You can also leave them there to dry for a few hours. I let mine sit about 6 hours before I placed them into a sealed container.
I added the noodles to our chicken that had been cooking all day and it made the most delicious chicken and noodle soup.
I can now add this to my list of things to make at home instead of buying at the grocery store. I am so excited. Thank you Heather for teaching me!

If you have leftover noodles that you won't be using right away I have read that you can store them in a sealed container for up to a month. Do any of you have experience with preserving noodles? Do you keep them in a container or place them in the freezer? I'm interested in what you have to say.

This post is linked to the Frugal Tuesday Tip hosted here at Learning the Frugal Life.

Wednesday, January 25, 2012

Homemade Bread Recipe

I have been back to making my own bread pretty faithfully the last couple months instead of buying store bought. It took a little while to convince the kids that this was a much better bread both economically and nutritionally. Now 2/5 of the children love it, the other 2/5 will eat it if they have too which is really all that matters, and the baby will eat anything so she doesn't count. My husband and I both really like this bread especially warm out of the oven with butter or honey!

We use this bread for everything. It makes great toast, sandwich bread or just plain ol' bread and butter. I have posted the recipe before but here it is again with a few variations.

Ingredients~
2 cups warm water (110 degrees)
2/3 cup honey *or sugar
1 1/2 Tablespoon yeast

1 1/2 teaspoon salt
1/4 cup oil
6 cups bread flour *I use 2 cups whole wheat flour and 4 cups bread flour, you can adjust it however you like.

Directions~
1.In a large bowl dissolve honey or sugar in warm water and then stir in yeast. Allow to foam.
2. Mix salt and oil into yeast mixture. Add flour 1 cup at a time. Knead dough on a lightly floured surface till smooth. Place in a well oiled bowl and cover with damp cloth. Allow to rise till double in bulk, about 1 hour.
3. Punch down and knead for a few more minutes. Divide dough in half and shape into loaves. Place into well oiled bread pans. Allow to rise for about 30 minutes or until dough is 1 inch above the pan.

4. Bake at 350 degrees for 30 minutes.
You can brush butter on the tops once it's out of the oven if you like. Enjoy!

Original recipe can be found here.

Monday, December 12, 2011

Homemade Taco Seasoning

I had tacos on the menu the other night. While browning the hamburger I realized I ran out of all my taco seasoning packets. How can that be? I had stocked up majorly like 2 years ago. I Didn't realize the supply had come to an end.

That was good though because I have been wanting to try and make my own seasoning mix. Here is the recipe I used.

Taco Seasoning
1 T Chili Powder
1/4 tsp Garlic Powder
1/4 tsp Onion Powder
1/4 tsp Crushed Red Pepper Flakes
1/4 tsp Dried Oregano
1/2 tsp Paprika
1 1/2 tsp Cumin
1 tsp Sea Salt
1 tsp Black Pepper

Mix all together and store in airtight container.I made a single batch and added it to my 2 lbs of ground beef. The verdict? We love it. Better than the store bought, or at least the brand we bought. It was less salty and all the kids and hubby agreed it tasted better.

I ended up making another batch, only I took the recipe times 8. This way I have it already to go the next time we make tacos.
This post is linked to the Frugal Tuesday Tip hosted here at Learning the Frugal Life.

Thursday, November 10, 2011

Another Homemade Birthday Cake

I thought I would share with you another birthday cake I made. We celebrated my daughters first birthday this past weekend. Here are her cakes. The big cake is 2 9x13 cakes put together and the small round cake is one that I made in a Pyrex dish.

I cheated and used store bought cake mix that I stocked up on for $.77 a box. The frosting was a new buttercream recipe that I tried and it was delicious!!

Here is the recipe. You can find the original recipe here.

Buttercream Frosting
3 cups confectioners sugar
1 cup butter
1 tsp vanilla extract *I used a little more, about 2 tsp
1-2 Tablespoons heavy whipping cream

Mix sugar and butter with mixer till blended then on high for 3 minutes. Add vanilla and cream and blend for another minute. Add more cream till you reach desired constistancy.

Here are my little baggies I used to decorate. They are just sandwich sized baggies and I cut a small hole in the corner.And here is my daughter enjoying her first birthday cake!

Tuesday, September 27, 2011

Frozen Apple Pie Filling

With my abundance of apples I decided to make up a large batch of apple pie filling and freeze it for future use. It worked great and made the house smell amazing for the entire day! Here is the recipe I used.

Apple Pie Filling
*24 cups sliced peeled apples
*2 cups white sugar
*2 cups brown sugar
*1 cup cornstarch
*2 teaspoons cinnamon
*1/4 teaspoon nutmeg
*1 teaspoon salt
*10 cups water

Peel, core and slice apples. Treat to prevent browning (I tossed mine with lemon juice). In a large pot (I used my canning pot) combine sugar, cornstarch, cinnamon, salt and nutmeg and water. Bring to a boil. Boil for 2 minutes stirring constantly. Add apples. Return to a boil. Once boiling, reduce heat, cover and simmer till apples are tender about 6 minutes. Remove from heat and allow to cool. Ladle into freezer containers leaving 1/2 inch headspace. This batch will yield approximately 5 1/2 quarts, enough for five 9" pies.

I ladled mine into gallon freezer bags. I place about 4 1/2 cups into each bag. This should be enough for 1 pie. Lay bags flat onto a cookie sheet and place into freezer. Once frozen, these will stack nicely and take up less space in your freezer.

Monday, August 8, 2011

Easy Frugal Camping Meal

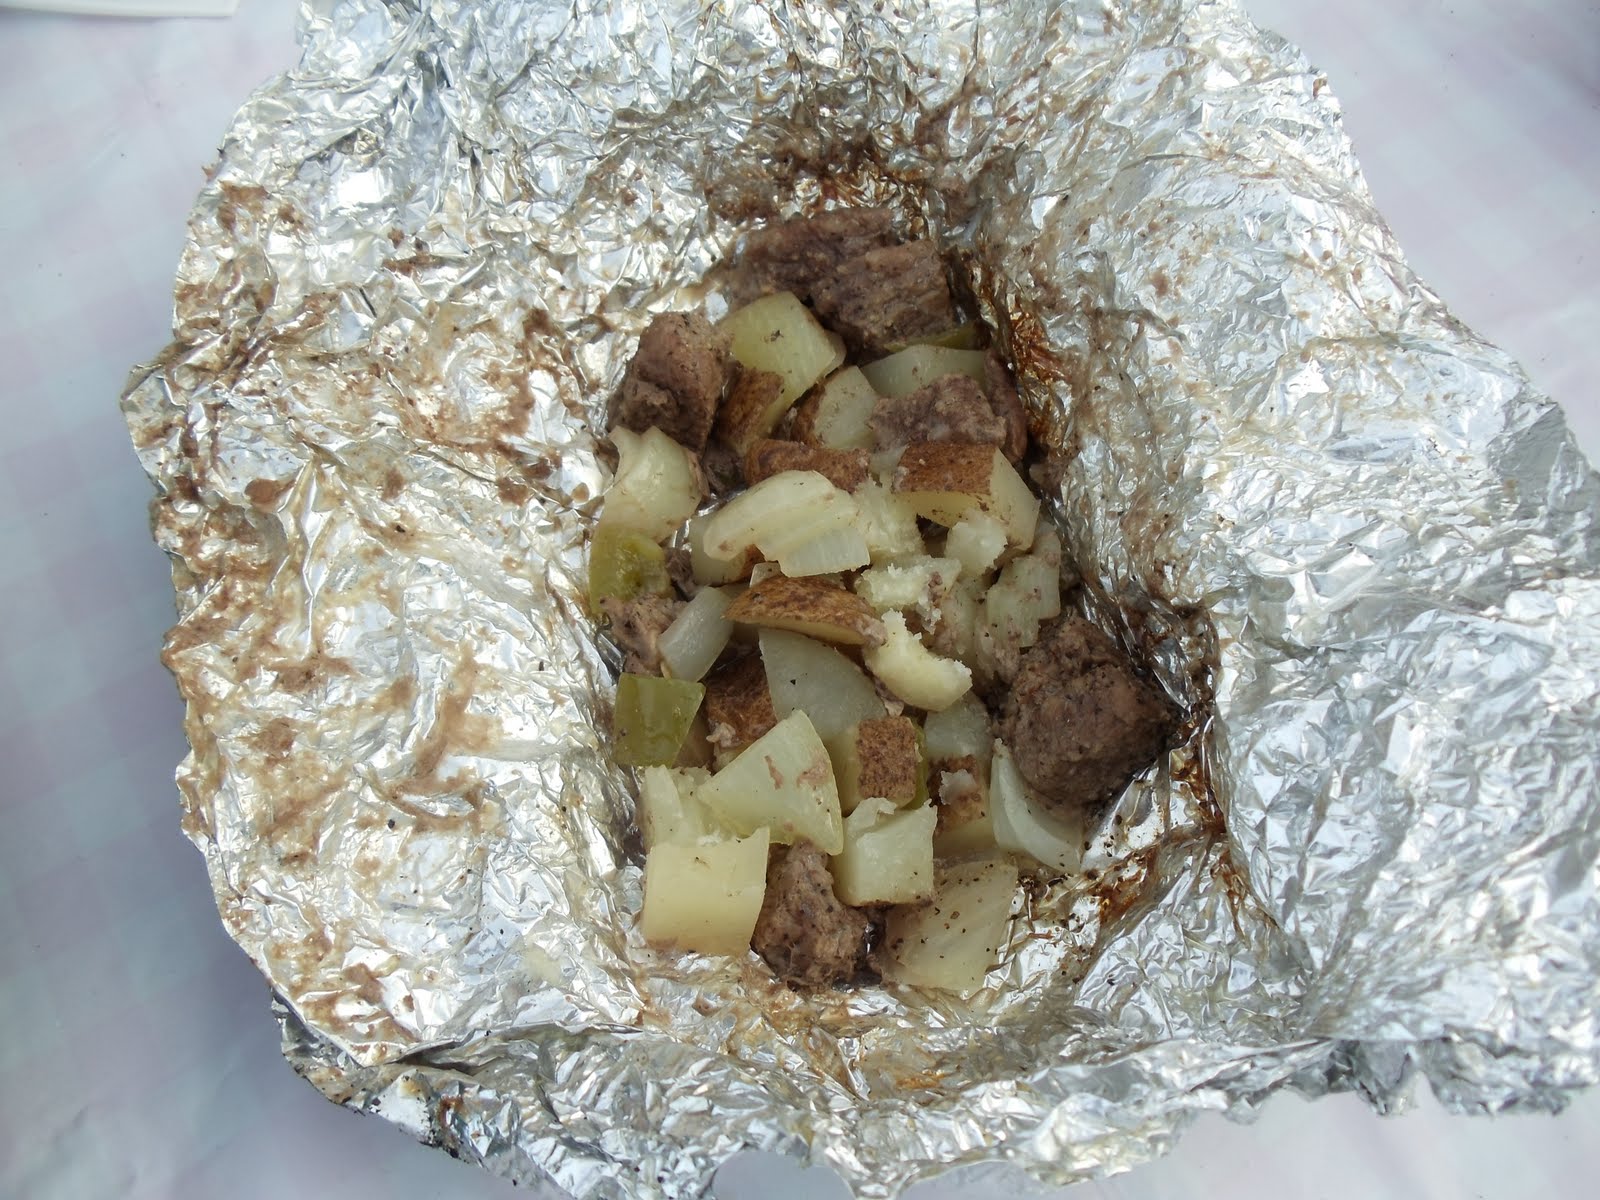
We went camping for the first time this year a few weekends ago. We had an awesome time. One of our favorite go to camping meals happens to be easy to make and easy on the budget. While I don't know if it is the official name, but we call them hobo meals. Here is how you make them.

First build your fire. You will want a good bed of coals to place the packets in. You don't want a lot of flames or the food will burn.

Take a piece of aluminum foil and in the middle add some stew meat. These are individual meals so everyone can add what ingredients they like. You can use any veggies and seasoning you want. We used cubed potatoes, green peppers and onions all from our garden. Add about a tablespoon of butter on top so nothing sticks to the foil, as well as salt and pepper. Fold into a packet. Place packets into the bed of coals and allow to cook for about 30 minutes or so. Turn the packets over about half way through. Pull one out and check to see if it is done. Once cooked place on plate and enjoy!We don't camp often enough and we really enjoy these meals. I think I will be adding them to the menu plan and try just putting them on the grill!

This post is linked to the Frugal Tuesday Tip hosted here at Learning the Frugal Life.

Thursday, July 21, 2011

Homemade Mulberry Jelly

The mulberries are at their peak right now in my area of the world. I have spent a few different days picking berries. I have frozen some to use in smoothies and this last batch I picked I made jelly for the first time.

I am super excited to share this jelly recipe with you. My family is pretty picky when it comes to jelly and jams. We are pretty much sold on grape. I have tried others in the past without much luck. I tried this recipe for mulberry jelly and not only did my first time making jelly work, my kids really liked it. It tastes very similar to grape jelly in my opinion.

I ended up making 4 batches (12 pints). I think we will no longer be buying store bought jelly. Love it!!I used the Berry Jelly recipe from the Ball Blue Book.

3 1/2 cups berry juice
5 cups sugar
1 package powdered pectin
2 tablespoons lemon juice

To prepare juice place clean mulberries into a saucepan and fill in spaces with water. Use potato masher to crush berries. Simmer berries until soft, about 15 minutes. Strain mixture through a damp jelly bag or several layers of cheesecloth to extract the juice. I used an old tea towel. Juice may be used fresh, canned or frozen for later.

To make the jelly, add 3 1/2 cups juice to sauce pan. Add pectin and lemon juice. Bring to a boil over high heat. Add sugar stirring till dissolved. Return to a rolling boil. Boil for 1 minute stirring constantly. Remove from heat.

Ladle hot jelly into hot jars leaving 1/4 inch head space. Adjust 2 piece caps and process in water batch canner for 10 minutes.

Yields 6 half pints or a little over 3 pints.

This post is linked to Simple Lives Thursday at Spain in Iowa.

Saturday, July 16, 2011

Homemade Baby Food - Green Beans

We have moved onto greens at our house. My daughter just turned 8 months old and so far I have made all her baby food with good outcomes. She however is not a fan of green beans. I may just start giving her the cooked beans as finger foods and see how she does with that. If you are interested in making baby food here is how I did my beans.

I selected a batch of organic green beans from a local farmer's market since my beans that are in my garden are slow growing. Clean and snap green beans.
You can either steam or boil the beans. I chose to boil mine. I added the beans to a pan and then barely covered with water. I boiled mine with the lid on for about 13 minutes.
Once cooled, I added the beans to the food processor. Beans are a little stringy so I ended up adding them to the blender with a little bit of water afterwards and pureed them to a thinner consistency. I saved some in the fridge to give to the baby and froze the rest in ice cube trays for later.

Learn how to make homemade baby food using...

Apples
Bananas
Sweet Potatoes
Carrots

Monday, July 11, 2011

Mulberry Season


Tis the season of mulberries! In Iowa they are plentiful. You can find them in parks, along trails, sometimes even in your own backyard. When I was a child my hands and feet would be stained purple from walking around barefoot under the trees and picking berries right off the tree and eating them.Fast forward 25 years and my hands are again stained purple from picking mulberries. Thanks to my sister and sister-in-law I have found my love for mulberries again. I went with some of my children and my sister and her girls to pick berries a few weeks ago. With this batch of berries I came home with we ate some and froze the rest to make smoothies. To freeze the mulberries; wash and spread mulberries in a single layer onto a pan. Lay a towel under the berries to prevent them from sticking to the pan. Place pan in freezer for a few hours. Place berries into bag, label and freeze. This makes it easy to just pull out what you want. The berries will be frozen individually and not stuck in one big chunk.

Mulberry smoothies are easy and my kids love them. Here is our recipe.

Mulberry Smoothie
1 cup frozen mulberries
16 oz frozen strawberries
1 cup yogurt
Milk to desired consistancy

You can experiment with different berries or fruits. We have also added bananas and blueberries and they are just as yummy!

Stay tuned for a future post on mulberry jelly!

This post is linked to the Frugal Tuesday Tip, hosted here!